How to Make Handmade Cards
Want to learn how to make handmade cards for all sorts of occasions?
On this website we will be showing you how to make handmade cards with quilling, cross stitch, rubber stamping, paper folding, scrapbook techniques, and other techniques.
So where do we start?
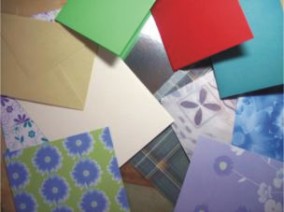 If you are new to cardmaking or crafting in general you will need to buy, borrow or otherwise acquire some general equipment.
Of course paper and card are essential to any crafter, along with scissors, craft knife, bone folder, embossing tool, paper trimmer, adhesives, a ruler, a cutting mat, pencils, tweezers and perhaps a paper punch or two. As you get more experienced in learning how to make handmade cards there will be more things that you will find useful but we will cover them as needed for particular projects.
Paper and card
A selection of papers in a range of colours, textures, thicknesses and finishes is essential. You can buy these from craft stores or over the internet. Ebay is also a good place to search for bargains. But also keep your eye open for "free" sources of pretty papers. How about those paper bags that shops put your purchases in? Some are really attractive, but even the plain coloured ones can be useful. Or that paper that your flowers came wrapped in (if its dry). Even sweets can be wrapped in pretty papers. Don't overlook anything.
You can even make your own handmade paper, a great way to recycle some of your waste. Look out for pearlised, metallic, mulberry, holographic, translucent or shimmery paper when in the craft store.
Of course you can't make a card without the cardstock. Some card will come ready folded and may even have an aperture cut out for you, but plain sheets are really useful. They don't limit you to particular shapes or sizes. Again you can pick from different finishes and textures or even double sided card. Go for the best quality you can here as your finished card will need to stand up by itself with the added weight of all your embellishments.
Here in the UK we like to use A4 paper and card. From one sheet you can make one A5 card, two tall cards or two C6 (which is half A5). If yours is square this is fine, just be prepared for less regular sized cards or more leftovers!
Getting your message across
One of the steps in learning how to make handmade cards is the addition of a greeting, poem or verse inside the card.If your cardstock is dark in colour you can either write in silver or gold pen or use an insert. Use white or light coloured folded paper on which to write or print your greeting. You can tape this to the inside of the card or use a ribbon or fibers to tie it in place around the fold.
Sticky stuff
There is nothing more guaranteed to turn you off learning how to make handmade cards than glue problems! I sometimes think glue has a mind of its own. It seems to get everywhere except where it is supposed to be.There are jobs where tacky glue is necessary, such as when paper quilling, but for other occasions you can use alternatives nowadays.
Double sided tape is wonderful stuff. It is easy to apply, not messy but holds well. A tip for using it is to fold back just a little of the backing paper once you have stuck the tape to your card. Then lay your work in place on top and grab hold of the folded ends and pull the paper off the tape, leaving your embellishment attached neatly and cleanly.
Sticky fixer pads are great if you want a bit of dimension in your work. Basically they are small square of foam with double sided tape on both sides.
Glue dots are also very useful. While you are learning it is a good idea to pick the non-permanent variety. This doesn't mean they won't stick, just that you will be able to reposition things slightly before they make a permanent bond. Very handy.
In fact this would be a good time to suggest trying different layouts on your card before you begin sticking things down. This is the design part of how to make handmade cards so take your time and play around before making placement decisions.
Christmas quilling designs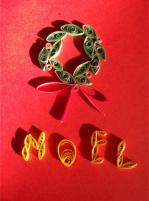 | Handmade birthday cards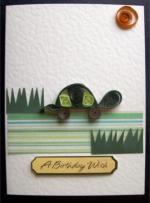 | Handmade new baby cards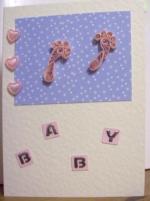 |
The finishing touch
Learning how to make handmade cards is fun but how do you present them when finished? A decorated envelope or box can make that final finishing touch. Whether you just add a rubber stamped motif or a quilled flower or go the whole way and make an envelope that matches the card, the care taken in presentation will make the whole card giving experience even more wonderful.Move on to our page on card making ideas.
- Return to top of how to make handmade cards
- Ideas for making new baby cards
- Handmade birthday cards
- Paper quilling a card for a new baby
- Return to home page
